Moving out can be exciting, but it’s also a lot to handle. Between packing, organizing, and planning your move, cleaning often ends up last on the list. Still, it’s an important step. A clean home helps you get your security deposit back, meet your landlord’s expectations, and leave the place ready for the next tenant.
To make things easier, we’ve created the ultimate move out cleaning checklist so you can stay on track and stress-free. And if you need extra help beyond cleaning, AFA Movers is here to make your move simple and smooth.
Why a Move Out Cleaning Checklist Matters
For renters, leaving your space clean is often the difference between getting your full security deposit back or losing part of it. Landlords usually expect the place to look just as good as when you first moved in. A proper checklist makes sure you don’t miss those small but important tasks that can cost you money.
If you’re selling a home, cleanliness also plays a big role in first impressions. Buyers walking into a spotless house will view it more positively and may be more willing to close quickly. Even if you’re simply moving out with no inspection, following a checklist keeps the process organized and far less stressful.
Before you begin, make sure you’re prepared with all the key supplies and essentials. Our blog on the essentials for moving out can help you get ready efficiently.
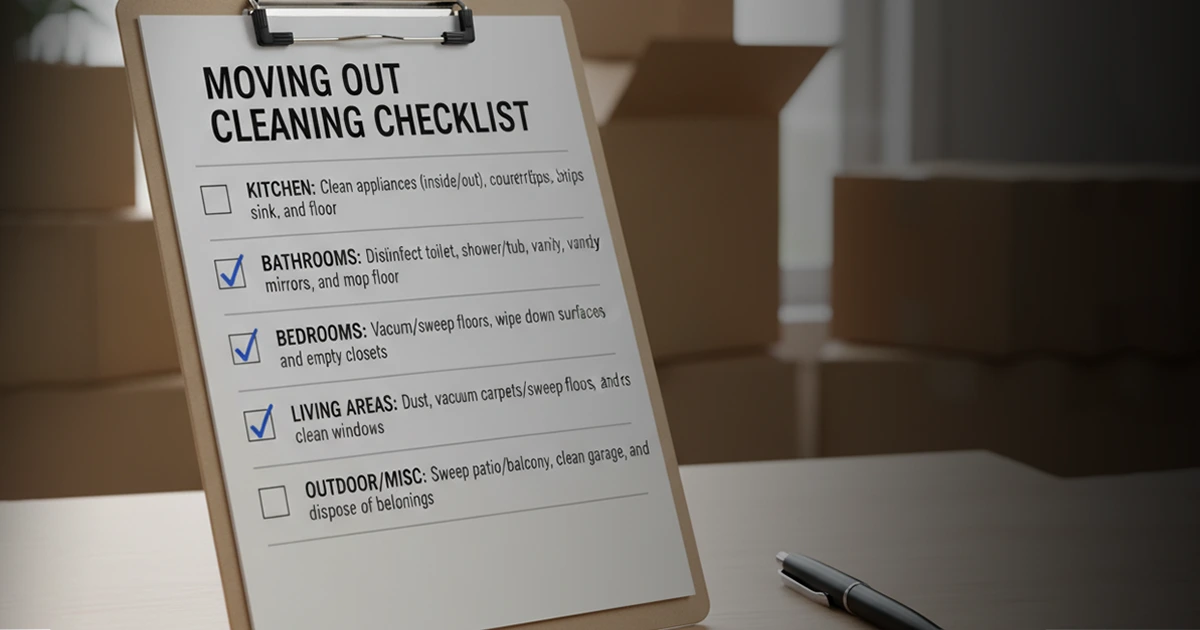
Complete Move Out Cleaning Checklist
A successful move-out clean is all about structure and attention to detail. This checklist covers every room and task you’ll need to tackle, from ceiling fans to floors. Follow each step in order to save time and make sure nothing gets overlooked. By the end, your home will look inspection-ready and move-out approved.
Clear Out All Personal Items
Before you begin cleaning, remove all personal belongings from the property. Empty closets, cabinets, drawers, and storage areas to make every surface accessible. This also ensures you don’t accidentally leave behind valuable or sentimental items.
Once everything is cleared, do a quick walkthrough to double-check hidden spaces like under sinks or behind doors. Having an empty home makes the cleaning process smoother and helps you see dust, stains, or clutter you might have missed earlier.
Dust Fans, Light Fixtures, and Air Vents
Ceiling fans and vents often accumulate layers of dust that can easily go unnoticed. Use a microfiber duster or cloth to clean fan blades, light fixtures, and vent covers thoroughly. If reachable, remove vent covers and rinse them for a deeper clean.
Clean fixtures not only improve air quality but also make the space feel fresher and brighter. Regular dusting helps avoid allergens and gives the entire room a polished look, something landlords always appreciate during inspection.
Vacuum Carpets and Sweep Floors
Carpets can trap dust, debris, and odors, so vacuum them slowly and carefully. Use the vacuum’s edge tool to reach corners, under furniture, and along baseboards. For stained or heavily used carpets, a professional or rented steam cleaner can make a big difference.
Hard floors deserve equal care. Sweep first to remove dirt and grit, then mop to achieve a clean shine. Always start from the farthest corner and work toward the exit to avoid stepping on freshly cleaned floors.
Wipe Down Surfaces and Countertops
Every flat surface in your home should be free from dust, spills, and smudges. Use a gentle, multipurpose cleaner to wipe down desks, countertops, window sills, and shelving units. In the kitchen, pay close attention to grease-prone areas near the stove and sink.
Clean surfaces instantly make a room look refreshed and well-kept. Be sure to dry everything afterward to prevent streaks or residue, especially on glossy or stone countertops.
Clean Inside Cabinets, Drawers, and Shelves
Open and empty every cabinet and drawer before wiping them down with a damp cloth or mild cleaner. Food crumbs, dust, and forgotten items often collect in corners, especially in kitchens and bathrooms.
Once cleaned, leave cabinets and drawers open for a few minutes to air dry completely. This ensures no moisture is trapped inside, preventing mold and odors for the next occupant.
Deep Clean Appliances Inside and Out
Appliances often show the most wear and tear, so they need extra care. Clean the inside of the fridge, removing shelves and drawers to wash them separately. Wipe down the exterior to remove fingerprints, smudges, and any sticky residue.
For ovens and microwaves, use degreasing cleaners to remove baked-on grime. Don’t forget small appliances like toasters and coffee makers cleaning these details can help your kitchen look spotless and inspection-ready.
Scrub and Sanitize Bathrooms
Bathrooms need to sparkle by the time you move out. Use disinfectant cleaners to scrub sinks, toilets, tubs, and tiles thoroughly. Remove soap scum, mildew, and hard water stains for a fresh, hygienic finish.
Pay attention to fixtures like faucets, handles, and mirrors; they should shine and be streak-free. Don’t forget to clean behind the toilet and along grout lines, where dirt and bacteria often hide.
Wash Interior and Exterior Windows
Clean windows can transform how bright and welcoming your home looks. Use a streak-free glass cleaner or a vinegar-water mix to clean both sides of the glass if possible. Wipe frames and tracks to remove dust and grime buildup.
For higher or hard-to-reach windows, use an extendable tool or hire professional help. Sparkling windows let in more light, creating a positive impression during your final walkthrough.
Empty Trash Cans and Remove Debris
Before you leave, make sure every trash can in the home is emptied. Dispose of garbage, recycling, and unwanted items properly. Wipe the inside of bins to remove odors or leftover residue.
Do one last walkthrough of each room to pick up small debris or forgotten items. This step ensures a clean slate for the next tenant and makes your move-out truly complete.
Repair Walls and Touch Up Paint
Small nail holes or scuff marks can make walls look worn out. Use spackle or wall filler to patch holes, then lightly sand and touch up with matching paint. Even small repairs can make a big difference in appearance.
After the paint dries, inspect walls in natural light to spot any missed areas. A smooth, uniform finish not only looks great but also increases your chances of getting your full security deposit back.
Move Out Cleaning Tips to Save Time
Move-out cleaning can take longer than expected, especially when you’re also packing and organizing your move. The best way to save time is to plan smartly and clean with purpose instead of rushing at the end. A little preparation makes a big difference and helps you stay stress-free during the process.
Time Saving Tips:
- Start early and focus on one room at a time
- Declutter before cleaning
- Clean top to bottom (ceiling to floor)
- Divide tasks with family or roommates
- Use eco-friendly solutions like vinegar and baking soda
Your Move Out Cleaning Made Simple
Moving out doesn’t have to be stressful when you follow the ultimate move out cleaning checklist. From protecting your deposit to leaving a fresh space behind, a structured plan makes the process easier and more efficient. Remember to gather your supplies, start early, and pay attention to those often-missed details. If cleaning feels overwhelming, professional services can take the load off your shoulders.
At AFA Movers, we go beyond just cleaning. Our trained professionals are efficient, respectful, and committed to protecting your property every step of the way. With flexible scheduling designed around your timeline, we make your move-out process smooth and stress-free. If you need help with more than just cleaning, we offer complete moving support you can rely on from start to finish.